Phlebostatic Axis: Location, Purpose, and Why It Matters for Arterial Pressure Monitoring
Learn what the phlebostatic axis is, how to find it at the 4th intercostal space and midaxillary line, and why it matters for zeroing arterial transducers.
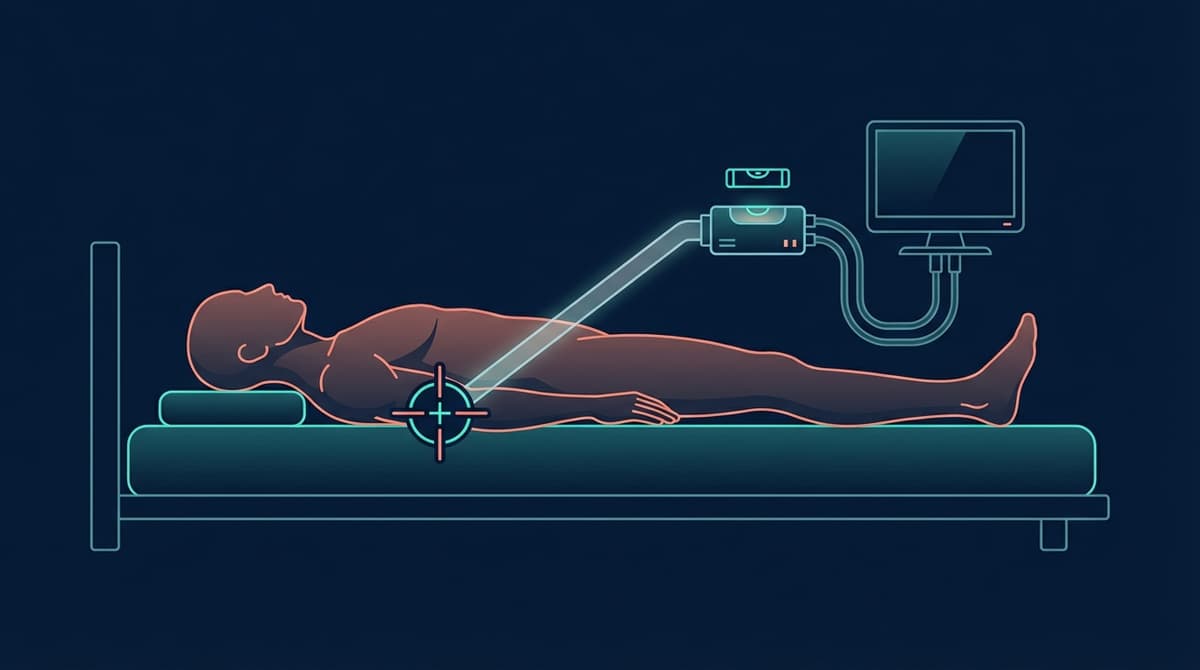
The phlebostatic axis is the external anatomical reference point used to level hemodynamic transducers for invasive arterial and central venous pressure monitoring. It sits at the intersection of two imaginary lines: one drawn horizontally at the level of the fourth intercostal space, and another drawn laterally at the midpoint between the anterior and posterior chest surfaces (the midaxillary line). This point approximates the position of the right atrium and serves as the zero-reference level for all intravascular pressure measurements. If the transducer is not level with the phlebostatic axis, hydrostatic pressure differences introduce systematic errors that can be as large as 7-8 mmHg per 10 cm of height discrepancy.
Understanding the phlebostatic axis has become newly relevant outside the ICU. As cuffless blood pressure estimation from photoplethysmography (PPG) moves toward clinical use, the same hydrostatic pressure physics that demands careful leveling in invasive monitoring also affects PPG-derived readings taken at different body positions. A wrist-worn PPG sensor held at heart level will produce a different pressure estimate than the same sensor dangling at the user's side.
Locating the Phlebostatic Axis: Step by Step
Finding the phlebostatic axis requires identifying two anatomical landmarks and marking their intersection.
Step 1: Identify the fourth intercostal space. Starting at the sternal angle (angle of Louis), palpate laterally to find the second rib. Move your fingers downward, counting each intercostal space: second, third, fourth. The fourth intercostal space sits between the fourth and fifth ribs.
Step 2: Find the midaxillary line. With the patient supine, identify the anterior axillary fold (front of the armpit) and the posterior axillary fold (back of the armpit). The midaxillary line runs vertically through the midpoint between these two folds. In practice, this corresponds roughly to the midpoint of the anteroposterior chest diameter at that level.
Step 3: Mark the intersection. Where the horizontal plane at the fourth intercostal space crosses the midaxillary line is the phlebostatic axis. Some clinicians use a small adhesive marker or pen mark on the patient's skin so the reference point can be relocated during position changes.
For most adults in the supine position, this point falls approximately 5 cm below the sternal surface, at a position that closely approximates the level of the right atrium. Studies using MRI and CT imaging have confirmed that the phlebostatic axis corresponds to the mid-right-atrial level in 85-90% of adult patients, though body habitus introduces some variability (Courtois et al., 1995).
Why Leveling Matters: The Physics of Hydrostatic Pressure
Blood is a fluid, and fluids in vertical columns exert hydrostatic pressure proportional to their height. The relationship is straightforward:
P_hydrostatic = rho x g x h
Where rho is blood density (~1060 kg/m^3), g is gravitational acceleration (9.81 m/s^2), and h is the vertical height difference in meters. For blood, this works out to approximately 0.77 mmHg per centimeter of vertical displacement.
If a pressure transducer sits 10 cm below the phlebostatic axis, the measured pressure will read approximately 7.7 mmHg higher than the true intravascular pressure at the right atrial level. Conversely, a transducer positioned 10 cm above the axis will underread by the same amount.
This is not a calibration problem or a sensor deficiency. It is physics. The column of fluid in the tubing between the catheter tip and the transducer creates a real pressure difference that adds to (or subtracts from) the physiological signal.
Clinical impact of misleveling:
| Height Error | Pressure Error | Clinical Consequence |
|---|---|---|
| 5 cm too low | +3.9 mmHg | May trigger unnecessary vasodilator treatment |
| 10 cm too low | +7.7 mmHg | Systolic reads ~158 instead of true 150 mmHg |
| 5 cm too high | -3.9 mmHg | May mask hypertension requiring treatment |
| 10 cm too high | -7.7 mmHg | Hypotension may be missed |
A 2019 observational study in a surgical ICU found that transducer height deviated from the phlebostatic axis by more than 3 cm in 34% of routine measurements, resulting in clinically significant pressure errors that influenced treatment decisions in 12% of cases (Romagnoli et al., DOI: 10.1007/s10877-018-0207-x).
Zeroing and Leveling: The Two-Step Calibration Process
Leveling and zeroing are related but distinct procedures, and both must be performed correctly for accurate pressure readings.
Leveling means physically positioning the transducer at the same height as the phlebostatic axis. The transducer is typically mounted on an IV pole with an adjustable clamp. A carpenter's level, laser level, or visual alignment is used to confirm the transducer's air-fluid interface (stopcock) is at the marked phlebostatic axis.
Zeroing means opening the transducer to atmospheric pressure and setting the monitor to read zero. This eliminates the effect of atmospheric pressure (which acts equally on the patient and the transducer) and corrects for any electrical drift in the sensor. The stopcock is turned to the "off to patient" position, opened to air, and the monitor's zero function is activated.
When to re-level and re-zero:
- After any change in patient position (raising the head of bed, turning the patient, sitting up)
- At the start of each shift (standard nursing protocol)
- Whenever readings seem inconsistent with clinical status
- After transducer disconnection or tubing changes
A systematic review of ICU nursing practices found that only 58% of nurses re-leveled after position changes, despite this being a standard recommendation in hemodynamic monitoring guidelines (Scales, 2010).
Hydrostatic Pressure and PPG-Based Blood Pressure Estimation
The same hydrostatic physics that demands careful leveling of invasive transducers creates a significant challenge for PPG-based cuffless blood pressure devices. When a PPG sensor estimates blood pressure from waveform features, the measurement reflects local arterial pressure at the sensor site, not central aortic pressure.
The arm position problem. A wrist-worn PPG device measures pressure in the radial artery at the wrist. If the wrist is at heart level, this pressure closely approximates brachial artery pressure. If the arm hangs at the side while standing, the wrist may be 30-40 cm below heart level, adding 23-31 mmHg of hydrostatic pressure to the local measurement. If the arm is raised overhead, the wrist may be 30 cm above the heart, subtracting a similar amount.
This is not a small effect. A 30 mmHg difference is the gap between normal blood pressure and stage 2 hypertension. Any clinically useful PPG blood pressure system must account for sensor height relative to the heart.
Current approaches to hydrostatic correction in PPG devices:
-
User instruction: Most current devices (including the Samsung Galaxy Watch with BP features) require users to hold the wrist at heart level during measurement. This is simple but unreliable, as user compliance varies widely.
-
Accelerometer-based arm position detection: Inertial measurement units (IMUs) built into smartwatches can estimate arm angle relative to gravity. Combined with an assumed arm length, this provides an approximate height correction. Research by Muehlsteff et al. (2008) showed that accelerometer-based corrections reduced position-dependent BP errors from 15-20 mmHg to 3-5 mmHg (DOI: 10.1109/IEMBS.2008.4649401).
-
Barometric altitude sensing: Some newer wearables include barometric pressure sensors that can detect height changes with centimeter-level resolution. This provides a more direct measurement of hydrostatic offset than IMU-based angle estimation.
-
Calibration restriction: Some PPG BP algorithms are only validated for a single body position (supine or seated with arm at heart level) and explicitly exclude measurements taken in other positions.
For more detail on how PTT-based methods handle these challenges, see our guide to PPG pulse transit time and blood pressure.
Body Position Effects Beyond Hydrostatic Pressure
Position changes affect PPG blood pressure readings through mechanisms beyond simple hydrostatic correction. Postural changes trigger autonomic reflexes that genuinely alter blood pressure, vascular tone, and cardiac output.
Supine to standing: Gravity pools approximately 500-700 mL of blood in the lower extremities within seconds. Baroreceptors detect the drop in central pressure and trigger sympathetic activation: heart rate increases, arterioles constrict, and venous capacitance decreases. Systolic pressure may transiently drop 10-20 mmHg before recovering within 15-30 seconds. PPG waveform morphology changes simultaneously, with reduced pulse amplitude, increased heart rate, and altered dicrotic notch position.
Head-up tilt: A 60-degree head-up tilt redistributes blood volume and activates the same baroreceptor reflexes. The PPG perfusion index (PI) at the finger typically drops by 40-60% due to peripheral vasoconstriction, even as blood pressure is actively maintained by compensatory mechanisms. For context on PI changes, see PPG perfusion index in clinical use.
Trendelenburg position: Tilting head-down increases central blood volume, raises central venous pressure, and may increase stroke volume. Intracranial pressure also rises. The PPG waveform at the finger may show increased amplitude and altered morphology.
These reflex-driven changes are real physiological effects, not measurement artifacts. A PPG system that only corrects for hydrostatic height will still produce position-dependent readings because the underlying blood pressure itself changes with position.
Clinical Implications of Incorrect Leveling
Misleveling errors in the ICU have direct clinical consequences, and the literature documents several patterns.
False hypertension from low transducer placement is the most common error. When the bed is raised and the transducer stays on the IV pole at the original height, the transducer drops below the phlebostatic axis. Systolic readings appear elevated, and clinicians may administer vasodilators or increase antihypertensive medications unnecessarily.
False hypotension from high transducer placement is less common but more dangerous. If the transducer is above the patient (for example, hung on a hook rather than mounted on the pole at the correct height), pressures read lower than actual values. True hypertensive crises may be missed, or fluid resuscitation may be initiated inappropriately.
Inconsistent readings between shifts often result from different nurses using slightly different phlebostatic axis landmarks. Standardizing the marking technique and using skin-level indicators reduces this variability.
Position-dependent alarm fatigue occurs when the monitoring system triggers alarms after routine position changes because the transducer was not re-leveled. This contributes to the broader problem of alarm fatigue in critical care.
For a comparison of how invasive arterial waveforms and PPG waveforms encode similar clinical information, see our PPG continuous blood pressure monitoring guide.
The Phlebostatic Axis in Different Patient Populations
The standard phlebostatic axis reference assumes a typical adult body habitus in the supine position. Several populations require modified approaches.
Obese patients: Increased anteroposterior chest diameter shifts the midaxillary line posteriorly. The standard external landmark may not accurately represent the mid-right-atrial level. Some protocols recommend using one-third of the anteroposterior diameter measured from the anterior chest surface instead of the midpoint, though evidence for this modification is limited.
Pediatric patients: The proportional anatomy differs, but the same principle applies. The fourth intercostal space at the midaxillary line remains the recommended reference, though the absolute distance from the skin surface is smaller.
Lateral decubitus position: When the patient is on their side, the phlebostatic axis shifts. The reference should be adjusted to the midsternum level at the fourth intercostal space, recognizing that the dependent lung and mediastinal shift alter the relationship between surface landmarks and right atrial position.
Prone position: Used frequently in ARDS management, the prone position makes standard leveling difficult. The phlebostatic axis in prone patients is approximately at the level of the spine at T4, and the transducer should be leveled to the posterior chest surface at that level.
Connecting Invasive and Non-Invasive Monitoring
The phlebostatic axis represents a fundamental principle: pressure measurements are only meaningful when referenced to a known anatomical level. This principle applies regardless of whether the sensor is an invasive fluid-filled catheter or a non-invasive PPG optical sensor.
As PPG-based blood pressure estimation moves toward clinical adoption, the field will need standardized reference positions analogous to the phlebostatic axis. The current approach of simply instructing users to "hold your wrist at heart level" is the non-invasive equivalent of telling a nurse to "put the transducer roughly near the chest." It works when done carefully, but without standardization and verification, errors accumulate.
For a broader overview of PPG blood pressure measurement approaches and their accuracy limitations, see our comprehensive guide to PPG blood pressure estimation methods.
Frequently Asked Questions
Where exactly is the phlebostatic axis located?
The phlebostatic axis is at the intersection of the fourth intercostal space and the midaxillary line. To find it, count down from the sternal angle to the fourth intercostal space, then draw an imaginary horizontal line from that point to where it meets the midpoint between the front and back of the chest wall. This point approximates the level of the right atrium in most supine adults.
Why do you zero and level a transducer to the phlebostatic axis?
Zeroing eliminates the effect of atmospheric pressure on the measurement, and leveling ensures that hydrostatic pressure from the fluid column between the patient and the transducer does not add or subtract from the true intravascular pressure. Together, these steps produce readings that reflect the actual pressure at the right atrial level, which is the standard reference for hemodynamic monitoring.
How much error does incorrect leveling cause?
Each centimeter of vertical displacement between the transducer and the phlebostatic axis introduces approximately 0.77 mmHg of error. A 10 cm discrepancy causes roughly 7.7 mmHg of error, which is clinically significant. In one ICU study, 34% of routine measurements had transducer displacement greater than 3 cm.
Does the phlebostatic axis change when the patient sits up?
Yes. When the head of the bed is elevated, the phlebostatic axis moves with the patient's torso. The transducer must be re-leveled to match the new position of the fourth intercostal space at the midaxillary line. Failure to re-level is one of the most common sources of hemodynamic monitoring error.
How does the phlebostatic axis relate to PPG blood pressure devices?
PPG-based cuffless blood pressure devices face the same hydrostatic pressure challenge. A PPG sensor on the wrist measures local arterial pressure, which varies with arm height relative to the heart. The phlebostatic axis concept explains why these devices require the sensor to be at heart level, or why they need hydrostatic correction algorithms based on arm position sensing.
Can you use the phlebostatic axis for central venous pressure (CVP) monitoring?
Yes. The phlebostatic axis is used as the zero reference for both arterial and central venous pressure monitoring. CVP values are even more sensitive to leveling errors because the absolute pressures are much lower (normal CVP is 2-8 mmHg), so even small hydrostatic offsets represent a large percentage error.
What happens if you zero but forget to level the transducer?
Zeroing only removes atmospheric pressure offset. If the transducer is at the wrong height, the hydrostatic column between the transducer and the phlebostatic axis still adds or subtracts pressure from every reading. The numbers on the monitor will be consistently wrong by a fixed amount, which can be more misleading than random noise because it looks like a real physiological change.